Monday, September 30, 2013

DIY tutorial - no sew pillow covers

I'm back again with another amazing DIY tutorial for you- no sew pillow covers. Boom!

DIY no sew pillow covers

Similar to my no sew curtains, I used Stitch Witchery and I highly recommend this brand (and the super weight option). I tried Heat n' Bond one day when I was desperate, and it seriously SUCKS! Do not buy that crap!

Unlike my no sew curtains (can you tell I'm promoting that tutorial? you should probably go check it out), this tutorial is a little more confusing, so bare with me...

First things first- you need to figure out how much fabric you need.

You need 2 pieces of fabric per pillow. Your first piece will be 2" wider on each side to allow for your hem (mine was 24"x24" for a 22" pillow). Your second piece will be 2" wider and 7" longer to allow for your envelope and hem (mine was 24"x29"). In this case, I only needed 1 yard of fabric per pillow (54" wide and 36" long).

DIY no sew pillow covers

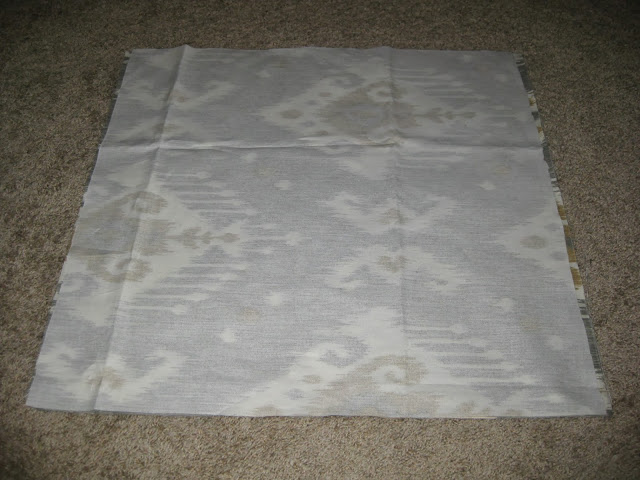
I started by making one large piece- 54" wide (the entire width of the fabric) by 29" long. Then I cut it in half width-wise, so each piece was now 29" long by 27" wide. Starting with the first piece of fabric I discussed earlier, I trimmed one of the pieces down to 24"x24" (cutting a bit off each side). Then I simply trimmed the second piece down to 24"x29". You don't have to be super careful about how straight your edges are, as they will be folded under the hem, so you won't see it.

Then, you want to cut your second piece in half length-wise. This second piece will be the back of your pillow, or the "envelope".

DIY no sew pillow covers
 
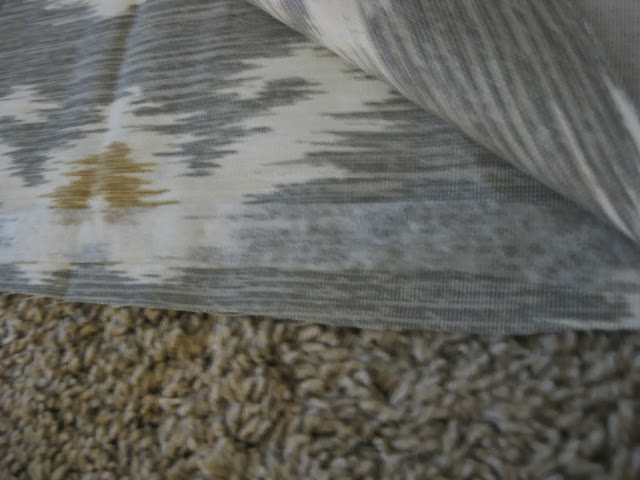
Next, take 1 of those pieces from the second piece and make a hem in the middle. This will be the back of your pillow (or the envelope) and the only hem you see. To make the hem, you first want to fold the fabric over about 1/2 and inch and iron it all the way across to get a nice crease. Like so..

DIY no sew pillow covers
 
Then cut your hem tape the length of the fabric and insert it deep into your crease...

DIY no sew pillow covers
 
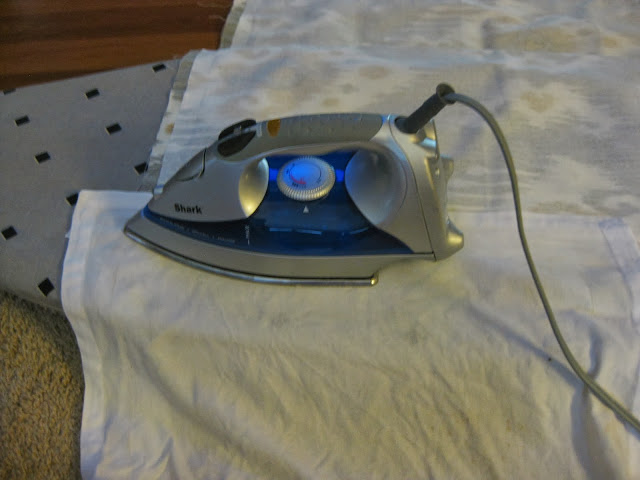
Then, if you're using Stitch Witchery, you'll fold the fabric back over the hem tape, lay a wet cloth over the fabric and lay your HOT iron on top of that. You want to create serious steam. Keep the iron in the same spot for 10 seconds, or about as long as it takes for the steam sound to stop, then pick it up and move it down the edge. You want to cover the entire edge with your wet cloth and iron (and hem tape- obv). 
 

Next you want to overlay the back 2 pieces (the piece you just hemmed and the other non-hemmed piece) so they match the size of the front piece. But inside out. So the pattern-side of the fabric is facing each other. Does that make sense? Eventually you'll turn it right-side out.

DIY no sew pillow covers

You're now going to start hemming all your edges. This is super easy. You literally just cut your hem tape however long your edge is, insert it between both pieces of fabric, iron and repeat until all your edges are hemmed. Take your time and remember to do both sides of the fabric.

DIY no sew pillow covers

DIY no sew pillow covers

Once you're done with all your edges, turn the fabric right-side out verrrry carefully! If you're anything like me, you can't wait to see your finished product and your hem tape will probably still be a little warm.


And VOILA! You have a pillow cover. Insert your pillow throw the opening in the back and tuck the un-hemmed piece of fabric into the hemmed piece. Since I have a crazy 16-month old, I used a safety pin to keep the 2 pieces together, but you could easily just leave it without or even sew a button (if you're really crafty!).

DIY no sew pillow covers

I hope this made sense, and if so- I can't wait to see all your fabulous new pillows!!! The options are seriously endless, and I plan to update my pillows every season now. I'm sure my husband will be thrilled!!

Good luck!

Monday, September 23, 2013

DIY tutorial - no sew curtains

Okay friends, I am so excited to share this DIY tutorial with you! This is so simple and it will save you bu-koos of money. Promise!

DIY no sew curtains

I've been eyeing $70 curtains at West Elm, and just couldn't let myself buy them. But I couldn't find any others that I liked as much. Then I decided to make them myself. Without a sewing machine. Boom and double boom.

Okay, so let's get started...

First, you need to figure out how much fabric you need...
Most fabric is 54" wide and 1 yard is 36" long. You want an extra inch on each side and bottom for the hem, and an extra 7" at the top for the pocket and hem. I trust that you can do the math, but if you have questions just message me!

Next, cut your fabric...
You do not need to be super careful about this, as you will fold and hem all the sides. Just make sure that the pattern in your fabric will line up once its hung. Somehow mine worked out perfectly and I didn't have to trim up the fabric to do this. And make sure your cuts are relatively straight.

Next, buy about 3546513 packages of this hem tape. I used 2 different types of hem tape (Heat n' Bond and Stitch Witchery) and I far prefer the SW. It's a little more expensive, but it bonds better. And for the love of everything holy, buy the super weight stuff. You will thank me later. I found this at Walmart for like $2.50 or something.


Now the fun starts...
You want to iron a hem first, before you start with the tape, so fold it over about a half inch and iron it to make a good crease.
Just like so...

DIY no sew curtains
 
Then measure the hem tape for however long you need and insert it into your hem crease. You want it to be deep into the crease. Just like this... (please ignore my disgusting ironing board, but please notice my awesome "party nails"- ha!)

DIY no sew curtains
 
The Stitch Witchery works with steam, so you need to use a wet cloth between your fabric and iron. I used an old cloth napkin. Make sure its pretty damp, you want to make some good steam here. And set your iron to the hottest setting.
 
So after you get the hem tape just where you need it, lay the wet cloth over the fabric and lay the hot iron on top. Keep it there for like 10 seconds, or about how long it takes for the steam sound to stop.

DIY no sew curtains
 
And you'll just move down your edge until the entire thing is "hemmed." Be sure to re-wet your cloth often. That's the biggest pain in the butt throughout this whole process. (the Heat n' Bond doesn't require that you use the wet cloth, but it doesn't hold nearly as well)
 
Once you've gone down the entire edge, flip the fabric over and do it again on the other side. You want to make sure this is nice and secure.

DIY no sew curtains
 
You'll do this for the 2 sides and bottom. And like I said- about a 1" hem is good.
 
Next up is the pocket at the top where you're curtain will slide onto the rod.
Measure 3.5", fold over and iron it all the way across. Again, you want a good solid crease there.

DIY no sew curtains

DIY no sew curtains
 
Similar to how you did the sides, insert the hem tape in that crease. But this time put it at the very end of the hem- so you create a pocket. Make sense?
Lay the wet cloth over your fabric and start ironing. Make sure you flip it over and do both sides.

DIY no sew curtains

And VOILA! You have curtains!

DIY no sew curtains
 
There are two fabric websites that I really like- Fabric.com and FabricGuru.com. I've ordered from both and they both deliver super quick, have great prices and lots of choices.
 
Good luck!!!
 
UPDATED: I now have a no sew pillow cover tutorial on the blog, too. Go check it out here.

Recipe - french toast casserole


I made this this morning because I wanted to use the rest of our bread and I wanted something easy that I could just pop in the oven. It was so yummy and delicious, I will definitely be making it again! The original recipe was found here, but I did change it up a bit. Per usual.
 
Ingredients
1/2 cup melted butter
1 cup brown sugar
12 slices of bread
4 eggs
1 1/2 cup milk
1 teaspoon vanilla
Cinnamon, to taste

Directions
1) Melt butter in microwave, stir in brown sugar.
2) Pour butter/sugar mix into bottom of 9x13 pan and spread around evenly.
3) Beat eggs, milk, vanilla and cinnamon.
4) Lay single layer of toast in pan (6 slices).
5) Spoon half of egg mixture on bread layer.
6) Add second layer of toast.
7) Spoon on remaining egg mixture.
8) Cover and bake at 350 for 45 minutes (uncover for last 15 minutes)
9) Sprinkle with powdered sugar and ENJOY!
 
You could easily add some pumpkin pie spice or pumpkin puree to "fall" it up, too. We'll definitely do that soon!
 
Yum Yum!

Friday, September 20, 2013

Five on Friday - Love List

I have been working on a Love List post for a week now, and I decided to go ahead and incorporate it into a Five on Friday Link-up...because...why not?!

So let's get started...FIVE things I'm LOVING right now!!

ONE.
my new washing machine - We got our old washing machine from a sweet friend FOR FREE a few months before we got married, and they worked great all this time! Almost 6 years! But a week or two ago, the washing machine started leaking. Turns out it started rusting on the bottom and sprung a leak. We decided to go ahead and buy a new one, seeing as we've never actually paid for one ourselves. To say we've been living in a cave for the past 10 years is clearly an understatement. We got a top loader, because we're just too damn tall for front loaders. And this thing is aweeeeesome (in the words of Tommy Boy- bahahahah!!!).


TWO.
these aztec palazzo pants - oh, sweet jeebus. These pants are so comfortable, it almost feels like you're naked. And they're LONG! The website says 35" inseam, but I think they're longer.


THREE.
my new bedroom curtains that I made all by myself without a sewing machine. Yes yes and YES! Be on the lookout for a DIY tutorial, y'all.


FOUR.
these floral skinny jeans - how perfectly dainty while still comfortable and easy? I need these right now. (and they come in long!) GAP is having their fall sale right now, so I just scored them for 35% off! Perfect!

FIVE.
this new sign - after returning from vacation, the only thing I could think was "There is no place like home." So when I stumbled on this cute sign, I just had to snag it. And it looks great on our B&W wall in our family room!


So what are YOU loving right now?? Link up with us and tell me!!

Monday, September 9, 2013

Recipe - easy-peasy (and delicious) lasagna


Disclaimer: if you came here expecting One Direction's, Justin Beiber's and/or David Beckham's favorite lasagna...I'm sorry. It's my husband's fault. But please stay and look around!! *kisses*

I like to do a yummy, hearty Italian meal for Sunday dinners. Most weeks I end up throwing together frozen stuffed shells or frozen cheese raviolis and a jar of my favorite vodka sauce, but this week I decided to make homemade lasagna, and to be even more ambitious- I didn't use a recipe. Usually we have Pizza Hut on speed dial for meals like this, but last night we were all completely shocked with the results. Easy-peasy homemade lasagna, like a boss. Here you are, friends...

Ingredients
28oz tomato puree (we like this brand- its organic and super low in sodium and delicious)
28oz whole San Marzano tomatoes (we like this brand and you gotta use San Marzano tomatoes, it makes all the difference in my opinion)
1/2 onion, chopped
3-4 garlic cloves, chopped
2 cups mozzarella, shredded (I just buy the bagged stuff)
2 cups parmesean, shredded
15oz ricotta cheese (I used part skim and it tasted just as good)
oven ready lasagna noodles
1 cup milk
Italian seasoning, to taste
Garlic salt, to taste
Black pepper, to taste

Directions
1) You want to make the sauce first and let it sit for like 2 hours. To do this, pour the whole San Marzano tomatoes in a large bowl and rip them apart. You want the chunks to be pretty big, and when you rip them apart you can take off any stems that are left. Then add the tomato puree. Chop up half a white onion and a few garlic gloves (we like garlic, so I used 4 cloves). Add the onion, garlic cloves and Italian seasoning, garlic salt and black pepper (I don't even know how much I used, a heafty shake or two of each?). Then cover it and put it in the fridge for a couple hours.
2) Then, about an hour before you want to eat- assemble the lasagna and bake. To assemble, you'll put a small amount of your chilled sauce on the bottom of a 9x13 pan (ungreased). Then start layering your uncooked noodles, sauce and cheeses. We had two layers, so ours was (from bottom to top) sauce, noodles, sauce, cheese, noodles, sauce, cheese.
3) Cover and bake at 400 for 1 hour. Uncover for the last 10 minutes and you can add a little more cheese if you're a cheese-aholic, like us.
4) Once done, remove from oven and let sit for 15-20 minutes to firm up. If you can wait. We couldn't last night, so ours was a bit runny. Still totally delicious. ENJOY!


Saturday, September 7, 2013

Gulf Shores 2013

We are back from Gulf Shores and I've had time to soak it all in, and let me just say- traveling with a toddler, while as FUN and ENTERTAINING as it is, is a UTTER shit show. And I really do mean that in the best way. We had so much fun showing Jacob new things, like sand and ocean and seagulls, but it was completely exhausting! My God! We probably will not be traveling to the beach or 12-hours anywhere for a few more years. Let's just put it that way.

I'll give you a quick run down, with pictures to document it all...

Josh and I woke up at 2am, packed up the last bit of junk and the coolers, woke Jacob up around 3am and threw him in his carseat and hit the road. Thankfully, Jacob fell back asleep quickly and ended up sleeping until 7am, or until Monroe, LA (about a 1/4 of the way through the drive). That worked out SO WELL. We stopped in Monroe and ate breakfast, changed Jacob's diaper and clothes and then hit the road again with me in the backseat entertaining the little nugget.

Here's Jacob as we traveling over the Mississippi River- he was watching Mickey Mouse

We stopped again in Hattiesburg, MS around noon and ate lunch. After that, we switched drivers and Josh sat in the back with Jacob. He took about an hour-long nap after lunch and was awake the entire time. Joy. He was actually quite good until the last 30 minutes. I don't blame him one bit! That's a long ass time in the car!

We stayed at the Phoenix East in Orange Beach and it was absolutely wonderful! We opted for a 2 bedroom, so Jacob had a room to himself. Our condo had a full kitchen, 2 bathrooms, washer/dryer, and awesome balcony overlooking the gulf. B-e-a-u-tiful! I took many pictures of the view, which will come up here soon....

Quickly after dropping our stuff off in the room, we threw on our bathing suits and hit the beach! I was beyond excited to see Jacob's reaction to the sand. Unfortunately, my excitement was short-lived, as he absolutely HATED the sand. Like total meltdown. Ughhhhh!!!!! Here's a few cute pictures of Jacob's first few minutes on the beach. LOL! How is this our child???


He literally didn't even want to sit on the towels on the beach blanket. By the end of the trip, he warmed up to sitting on the towels, but he still wouldn't really move around much. Too funny! And sad.

We ate dinner in our condo that night (hot dogs in the microwave and beans...gourmet, for sure) and quickly put Jacob to bed. We were exhausted after being awake for 18 hours! Josh and I drank a few glasses of wine on the patio and called it a night.

The next day was Labor Day and we spent a little bit of the morning on the beach, and then moved to the pool.

Jacob enjoyed my water and backwashing his goldfish into it...yuck!
During nap time every afternoon, I went down to the pool or beach and laid out, while Josh chilled on the couch in the condo and watched SportsCenter. Worked out perfect for us! I love these leg/beach shots. So relaxing...if only for those 2 glorious hours!


After Jacob woke up, we spent a little more time down by the pool before cleaning up and heading out to dinner.

Jacob and daddy enjoying a pouch
We went to dinner at The Hangout that evening. This place is really cool- right on the public beach, great food and really fun atmosphere! Plus they have these cute humongous chairs out back for picture opts! (and apparently they have concerts there, not like we would know though)


Tuesday morning it rained a little bit, so we spent the morning watching cartoons and watching the storm roll in. We got to enjoy our coffee on the balcony (for about 5 minutes) before Jacob decided it was time to go in.  I think I made a yummy breakfast scramble that morning too.


After the storm passed, we went down to the beach and pitched our awesome umbrella. How badass is that thing?!?! It worked soooo well. I also really loved the beach blanket that I bought- it had little corner pockets to put sand in, so it wouldn't blow away. Both items were definitely worth the money. And we'll use them for years to come.


watermelon on the beach? yes, please!
During nap time this day, I decided to stay up and hangout with Josh for a bit and drink a glass of wine. Heavenly, for sure.


Wednesday was our last full day, so we were determined to get Jacob to like the sand. Mother Nature had other plans. There was NO WIND whatsoever on the beach that day and it was hotter than hell down there. We stayed long enough to take this adorable picture of Jacob.


During nap time on our last day, I went down tot he pool and was the only one there for a good amount of it. So relaxing! I had my iPhone jamming some good tunes, a few cold brews in my bag and enough tanning oil to grease an elephant. Holler!


Before bed that night, we watched the sunset with the nugget (and Boo) and drank a celebratory glass of wine. Celebrating Jacob's 15-month birthday, of course.


The last morning Jacob decided to wake up at 5:30, so we got a pretty early start. We left the condo at 8am. This proved to be one of the biggest mistakes I've ever made. Jacob fell asleep three separate times for about 30 minutes to an hour each time, but that's it! 12 hours in the car with about 2.5 hours of quiet? Hells no. We stopped in Hattiesburg, Monroe and Marshall on the way home.
While in Monroe, we swung by the Duck Commander headquarters and bought J-bird a t-shirt and got this awesome family picture. I'd probably do the drive again just to get this badass picture. Not.


This was a random cute picture one of us took of Jacob in the backseat with all his buddies. We still have him rear-facing, so we setup the iPad on the headrest so he could watch Mickey Mouse and Doc McStuffins. That was a real lifesaver. He was pretty content with watching cartoons and eating snacks, but by the end of the trip he was SO READY to get out of the car (and so was I).

 
We got home around 9pm and swiftly went to bed. I spent most of Friday doing laundry and unpacking. Josh drove down to his mom's house to get the dogs (whom I missed terribly!!!) while I wrangled our crazy toddler.
 
Here are a few more of my favorite pictures from the trip...Non-iPhone pictures, that is.


We're all glad to be home now, and will probably stay local for upcoming summer vacations. Until all our kids are at least 20 5.
 
The saying "there's no place like home" really holds true now.
 
Cheers!
Kate